From the August 2011 newsletter, and one I thought worthy of being resurrected :)
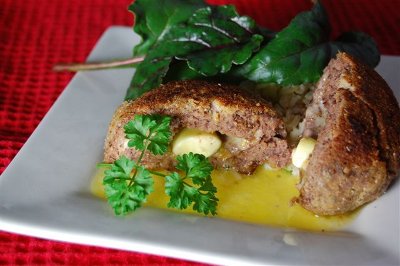
These Kidney Bean Kievs are mouth-wateringly more-ish, and will forever banish Kidney Bean Fear (KBF) at your house. Serve them up with some leafy greens and keep everyone guessing on the main ingredient. Shhhh... I won't tell if you don't!
Red Kidney Bean Kievs
Makes 6 substantial serves
Equipment:
- Large non-stick frypan
- Large colander (strainer)
- Large mixing bowl
- Small mixing bowl
- 2 small bowls, additional
- Fork
- Cling wrap
- Plate for refrigerating the kievs
- Food processor or potato masher
- Thin egg slice/spatula
- Paper towels or clean tea towels for draining the cooked kievs
- Dinner plates for serving
Ingredients:
- 2 x 400g tins red kidney beans
- 6 slices bread
- 3 eggs
- 2 tbsp butter or margarine
- 2 cloves garlic, crushed or 1/2 tsp dried garlic granules
- 1 tsp smoky paprika
- 1 tsp dried onion flakes or one small onion, diced
- Seasoning to taste
- 1 cup fine breadcrumbs
- Oil for pan frying
- Steamed rice and leafy vegetables to serve
Method:
Mix your butter or margarine with your garlic. Spread a sheet of cling wrap, about the size of an A4 page, on your bench. Pile the garlic butter into the middle of your cling wrap, and with the wrap around it, roll your butter into a little cigar shape. Refrigerate for 30 minutes.
Pour your kidney beans and their liquid into your colander and rinse under running cold water until they stop foaming. Then put the colander full of beans on the sink to drain well for a minute or two. Once drained, put the beans into your food processor or large mixing bowl. Process or mash them thoroughly until they form a thick paste.
If you are using a potato masher, and not a food processor, you now need to cut your bread into teeny, tiny cubes with a sharp knife. This makes them easier to mash into your bean paste.
Add two of your eggs, your bread cubes or slices, smoky paprika and onion and mix it all well to combine. Use clean, damp hands in your bowl to really squish it and mould it into a smooth paste if you're not using a food processor. Season to taste.
Crack your last egg into one of the small bowls and add your fine breadcrumbs to the other. Beat the egg with a fork.
Set up your plate for refrigerating the kievs on the bench nearby.
Remove your garlic butter from the refrigerator, and cut it into six round discs.
Tip your bean mixture from the food processor into your large mixing bowl. Divide your mixture into six roughly similar sized balls and keep them in your bowl.
Take a ball of bean paste mixture in your clean, damp hands, and flatten into a patty the size of your hand. Take a disc of garlic butter, and place it in the middle of your patty. Then carefully mould your bean patty around the butter by folding the edges into the middle, and forming back into a burger like shape. Continue with your other bean paste balls until the mixture is used up.
Now take each of your patties, dunk them into the beaten egg, then into the breadcrumbs. Toss them around in the crumbs until they are thoroughly coated. Once they're all crumbed, you can pop the kievs into the refrigerator for about 15 minutes, just to firm them up.
Heat your frypan over a hotplate heated to medium. Coat the bottom of the pan with oil. Pop the kievs in, and gently pan fry them, for about three minutes each side, turning once.
While your kievs are cooking, prepare your dinner plates for serving. I like to serve these with steamed brown rice and some beet or other green salad leaves.
Drain your kievs on some absorbent paper or a clean tea towel, and serve on your waiting plates.
The questions will come thick and fast... 'Mmm... what's this?'... 'Yummy, what's in these?'... 'Is this a new rissole recipe, Mum?'. You'll just give a Mona Lisa smile and keep that secret to yourself!

