Starting off a veggie patch, there's no time like now ;-)
Growing your own food can be one of the easiest ways to make a dent in the home budget. You have access to fresher produce than you could ever hope to find in the shops or markets & are also able to whip up a quick salad in less than 15min, a lot faster than nipping off down to the shops for most of us. Taking the first step can be rather daunting for some but I can assure you that once you sit down to a meal containing something you grew yourself you'll be hooked. Thought I'd run through a few basic gardening methods to give folks an idea of the ways you can grow your own.
How much space you need will depend on whether you wish to start out with a small potted garden or if you're willing to take the big leap & set up a garden bed of some sort. Position also matters as most plants do best with 6-8 hours of sunlight a day.
Bianca & I first started off with a few pots of herbs in a sunny spot near the front door of the first house we rented. It wasn't much but it was great to be able to add some home grown oregano to pizzas, mint to hot drinks & thyme to the casseroles. It was also in a spot that we passed a few times a day which helped remind us to keep them well watered. These plants did well in this position so pots of sweet basil & salad greens were added to the garden soon afterwards.
Once you have worked out what you want to grow & where you want to grow it, the next step is to work out how.
Container Gardens.
Container gardens are probably the easiest way to get your hands dirty when it comes to growing your own produce. For folks that rent it is often the only option as many landlords may not be too happy with the idea of lawn being removed for veggie patches.
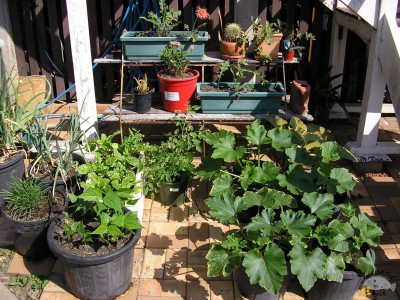
When it comes to sourcing pots & containers there is no need to spend a lot of money. We sourced large pots from the weekend markets, family & friends when we were starting out. There are also online groups like Freecycle that allow people to list items they want to give away rather than have them end up in land fill.

Have already posted a blog in January on how we've used containers & pots to grow food including a few ideas on soil mix selection for those interested in checking it out.
In Ground Gardens.
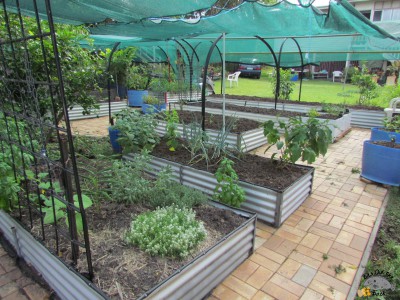
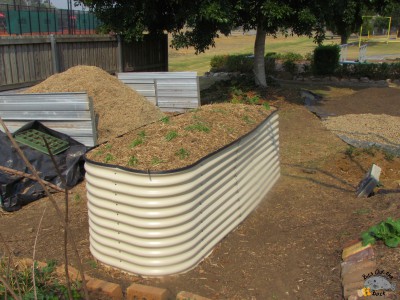
Traditional garden beds are probably the preferred way to raise plants for those that have a bit of available space, with raised beds probably being the most popular method used in the urban setting.
Having the soil elevated off the ground can help you create a soil structure that may give you better plant growth when compared to the native soil. This becomes very handy in situations where the soil drains too freely like the sandy soils around the coastline. In these areas you might need to add in a bit of organic matter or maybe even a small amount of powdered clay based water retention products to help improve the water holding capacity of the beds. Other areas may have poorly draining clay soils so a nice compost rich soil in a raised garden bed will offer better drainage allowing the roots of your plants to breathe & not get waterlogged.
To set up an in ground bed the first thing you need to do is select a position that gets a decent amount of sunlight (6-8 hours as mentioned above).
Next thing you need to do is remove or suppress the grass where the garden beds are to be situated.
Next step is to add in soil mixed with some compost. You can save yourself some money if you can use soil from your yard but that isn't an option for a lot of folks. You probably won't have a great deal of compost on hand either when you first start out so buying some in may be the best option. Buying a soil compost blend is something we have done before & can be a relatively cheap way to start up a bed. Stay away from the commercial bagged compost for large beds as it will be rather expensive. You will find you can buy compost at a fraction of the bag price from landscape suppliers at the same time you buy the soil. If you ask nicely some suppliers will also mix the compost through the soil saving you a bit of work.
One thing I would suggest at this point is to also consider starting off your own compost pile or compost worm farm. You will not only save money from buying in products to feed the patch but you will also be saving rubbish from landfill ;-)
A few ideas for raised bed borders.
Most folks like to have a border of some type around their beds to help keep the soil in place & to also help prevent the lawn growing into the beds.

Along with the raised bed gardens there are other low maintenance in ground styles like the "No Dig Garden" & the "Back to Eden" methods for people that might be interested. While these methods are normally used directly on the ground they can also be incorporated into a framed raised bed too.
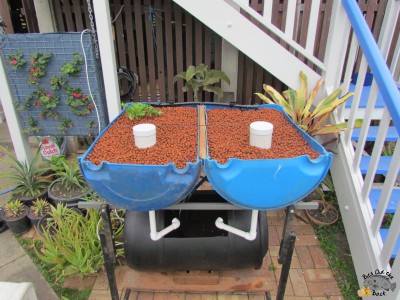
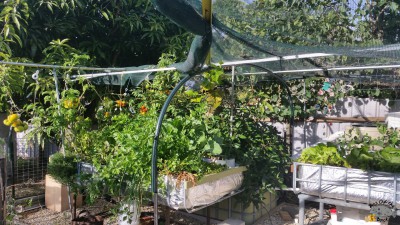
Other forms of gardening that might interest some are aquaponics & hydroponics.
I could actually keep going on but should probably end it there methinks ;-)
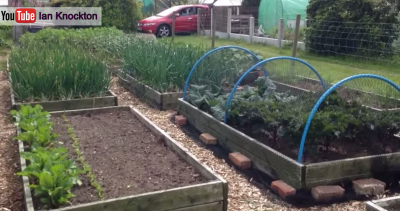
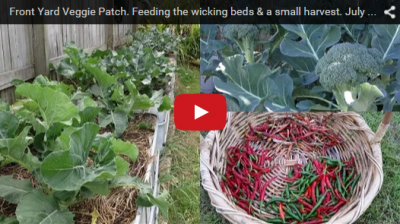
A look at the front yard veggie beds.
With only a few weeks of winter left I thought it best to start getting the asparagus beds fed up in the front yard veggie patch. Also took the opportunity to squeeze in an extra crop of broccoli before the weather starts to warm up too much. Decided to pull the camera out & do a bit of a clip for those interested in a look at how the beds were fed up using home made compost & locally sourced manures.
Was hoping to post a clip on the aquaponics for those interested in a look but I just haven't had the time to get around to it unfortunately. If you pop over to our YouTube channel in a couple of days there should be a bit of an update. Will come back here to post the link once it's uploaded too ;-)
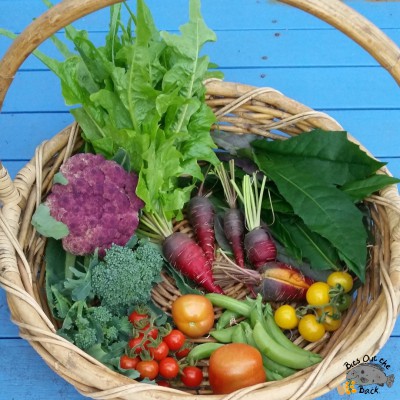
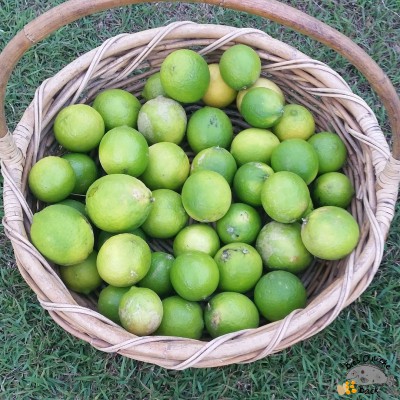
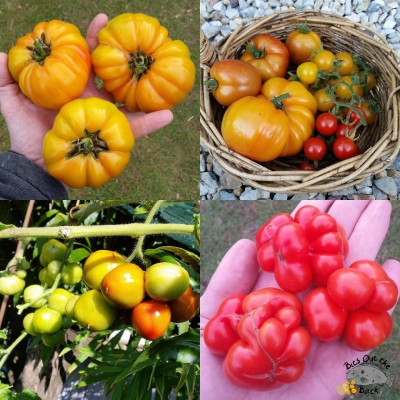
Pickings from the patch.
Despite the cooler weather we've been having over the past few weeks we're still getting some good harvests from the patch.
The tomatoes are still producing loads of fruit at the moment.


Have also been taking out a few Jade perch from the fish farm.

Am looking forward to harvesting all the fish from the fish farm so we can set up more veggie grow beds for the aquaponic system. Hopefully that will be done before summer here.
That's it for this month's blog.
Hope you're all getting plans under way for the spring garden.
Cheers all.

