Feeding up the patch for next to Nix..
This month's challenge on Simple Savings is all about getting out there & growing your own food.. Not only does it save you coin but you'll end up with some of the freshest & tastiest veggies you will ever eat.. One way to make growing your own food even cheaper is to make your own liquid fertilisers..
Manures, worm castings & composts are a great way to feed the plants & soil in your veggie patch for no or very little cost.. While a bag of manure can set you back a couple of dollars (if you don't know a friendly farmer that is), compost & worm castings can be made from the likes of lawn clippings, kitchen scraps, weeds, animal bedding (poultry, rabbit & guineapig) & tree pruning's.. When applied to the garden they add invaluable organic matter to help loosen the soil, retain soil moisture, as well as provide food for compost worms & other beneficial life forms..
Manures, worm castings, composts, can also be used to make up some tasty liquid fertilisers that will go much further than the compost/manure itself.. When a fertiliser tea is applied to the garden you are providing the plants with an instant boost of available nutrients suspended in the liquid & are also feeding the soil with the beneficial micro organisms that are also present in some of the teas..
Making up these liquid fertiliser teas can be relatively easy OR can be up scaled into a full on liquid fertiliser "brew" by adding air, molasses & other goodies to make up a tasty bacteria laden treat for your soil & plants.. To keep things simple I will be mainly talking about the basic teas that anyone who has a bucket/drum, some rich organic matter & water can make up..
Just a note here on water.. Most town/city water contains chlorine which is added to kill the bad microbes in the water.. If you are worried about killing beneficial microbes in the brew you can leave the water in an open top container exposed to the sunlight for a couple of days & that will help gas off the chlorine..
Manure Teas..
A big thanks to Puurrey wife for asking a question on the forum about manure teas, you helped me decide what to blog on this month ;-)
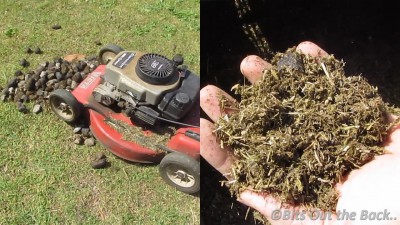
Manure teas are very basic & easy to mix up if you have a good supply of aged manure.. The only manure teas I've made up for this patch involved worm castings but will cover that below.. Growing up on our small farm we had an endless supply of cow manure from our 2 dairy cows, which was collected & left to age in a pile.. After the pats had dried out for a few months they were broken up & used as a top dress for ours & my grandparents veggie patches.. We would also add it to the compost piles or tumblers, to break down before being dug through the soils.. It is never a good idea to use fresh manure as it can be rather rich in nutrients & do more harm than good by burning plants.. Is best to let them dry out or compost before using..
My mother & grandfather used to make up a very basic brew with cow pats in a drum of water.. It was as easy as dumping a 10L/2½gal buckets worth of well aged, crumbled up manure into a 60L/16gal drum then filling it with water.. It would then be left to sit & soak in the water, breaking down the lumps over 3-5 days.. It was also stirred whenever we remembered & often became slightly "aromatic" (which I now know to be due to anaerobic decomposition).. When it came time to use the mix it was bailed out into a watering can & mixed 1:1 with water for use on the garden.. The remnants in the base of the drum were dumped into the compost heap, so got a second chance at making it out onto the patch at a later date..
Other aged manures can also be used like horse, sheep, goat & even some pet manures like guinea pig & rabbit.. We have also included fish waste from our aquaponics set up in a few different brews & concoctions.. I have read of a chap that makes up fertiliser tea from poultry manure but it is a much longer process that I am not familiar with.. Might be something for folks to look into if they feel game ;-)
Please note that manure from carnivores like cat & dog should never be used to make up liquid fertilisers as it can carry pathogens that can cause diseases in humans.. They need to be composted properly over a VERY long period of time..
Compost tea..
The compost tea that we make is very simple & can be added to the patch immediately with no brewing required.. About 15L/4gal of compost is used per batch with the tea being mixed up in a 60L/16gal drum.. Many folks will have their own ratios but this one works for us & haven't had any complaints from our plants as of yet ;-)
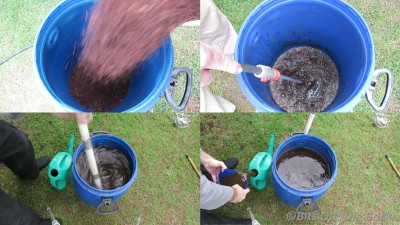
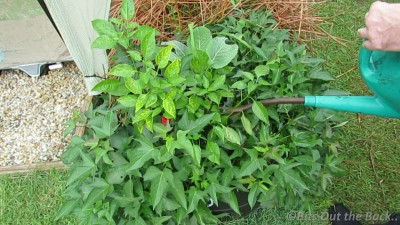
Once the compost is well & truly mixed with water you can bail/pour out the tea & water the garden.. I like to feed the heavy feeders like pumpkins/cucurbits, corn, tomatoes, capsicums, broccoli/brassicas etc, with this first batch from the barrel as it is the richest brew..
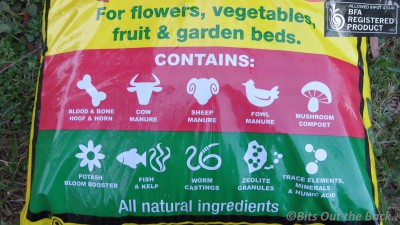
I would like to do this at least once a week but unfortunately the compost pile just wasn't that large & we ran out last weekend.. I've decided to bite the bullet & use a commercially bought compost blend we used when we first started the garden here & have had some great results with..
Worm Castings tea..
We now make up our worm cast tea in a similar way as we do the compost teas.. The main difference is the amount of castings we add into the mix..
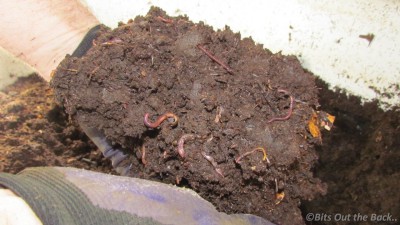
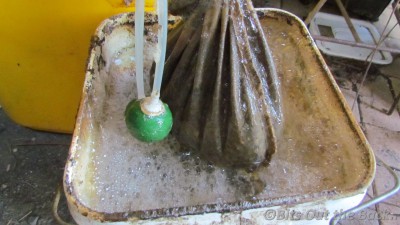
I used to suspend the castings in a stocking or paint strainer bag over night & massage the wormy goodness out of them by hand every few hours, but I now think the above method works just as well.. I do think that the plants respond well to this quick feed just as they do with the compost teas.. There is also evidence that some of the constituents of worm castings & teas made from it can help prevent disease & deter pests on plants.. Click HERE for a word doc download from Soil Ecology Laboratory of the Ohio State University regarding tests conducted on various garden pests.
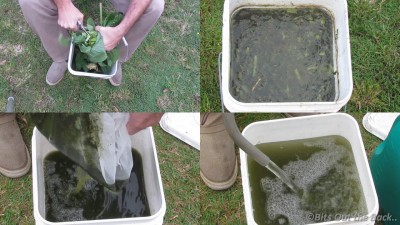
Weed/Green manure teas..
In a previous blog I posted details on one of the weed/green manure teas that we make up
but thought it was worth going over again quickly as these teas would have to be the easiest, if not cheapest of all to make..
Almost any weed will do but to make up a top notch brew it's a good idea to use some dynamic accumulator plants like comfrey, nettles or dandelions in the mix or even by themselves.. These plants have very deep roots that "mine" nutrients from deep in the ground, bringing them up to their leaves for us to harvest & make use of..
Brewed Teas..
Brewed teas are another great liquid fertiliser designed to boost the amount of beneficial microbes in the brew before adding it to the soil in the patch..
The same treatment can be given to the green manure teas.. It's not a necessity but it does help reduce the pungent aroma made by the steeping process & will help to increase the amount of helpful aerobic bacteria in the brew before applying it to the patch..
I hope that quick look at home made liquid fertilisers helps you out in some way..
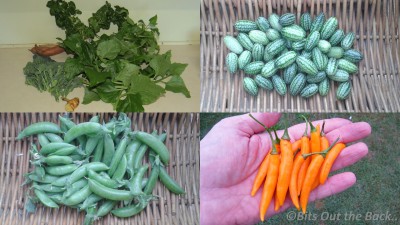
Tasty Harvests..
Have been very happy with the pickings so far this Winter .. We've been lucky enough to be able to keep picking a few crops that some folks only get the chance to pick during summer..
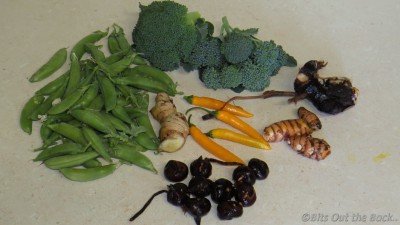
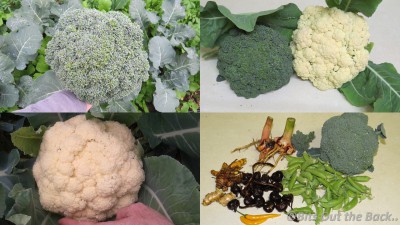
New favourite home grown (well, nearly all home grown) meal..
We really like our curries here, especially the SE Asian, Indonesian & Thai style meals which can get rather expensive when purchased routinely.. When we first started to sort the veggie patch out, some of the first plants we put into wicking worm barrels were turmeric, ginger, galangal & lemongrass.. This was followed fairly swiftly by a Kaffir lime tree to round out the essential plants needed to build up a great tasting curry.. Over the past 4 or so years I worked out that they have saved us thousands of dollars that would of made it to the cash register of the local take out, sorry Silver Keys :-/
One particular curry dish Bianca & I have been making has become a bit of a favourite here at the moment.. It is a fairly basic one using the spices & veggies we grow with only a few extras tossed in to round out the dish..
Coconut & Prawn Curry

I hope to be able to post a totally home grown yabby version of this (except for the coconut) before next winter ;-)
That's about it for this month's blog..
Hope you all have fun in the patch & shall catch you next time..
Rob..

