Composting Worms…
Part of the plan we have to become self sufficient as possible is to be able to produce enough nutritious food for the fish & chooks as well as ourselves.. Worms are one food source that will help cut down on the feed bill for the fish, plus composting worms are a great way to convert kitchen scraps into nutritious castings that your garden will love…
There are a few ways the castings can be used in the garden..
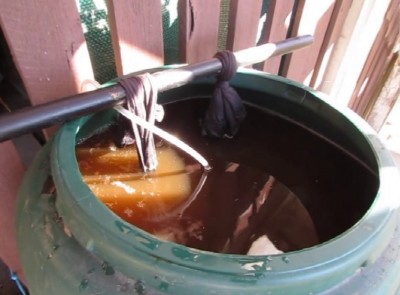 I have made worm cast tea out of them in the past by hanging a old stocking stuffed with a few handfuls of castings in a bucket of water for a day or so... I also added a tablespoon of molasses to the water & an aquarium air pump to help increase the good (aerobic) bacteria level…
Now I prefer to add a handful of the castings under seedlings & seeds when they are planted out.. Some people also recommend using the leachate (worm wee) straight from the farm but I have read from a few places that it can actually contains toxins created by bacteria that live in the anaerobic (without oxygen) environment.. Some disagree with this but I like to err on the side of caution & have not been using the leachate directly on the plants since reading about it. I will be researching this later because I have about 30 litres of leachate in bottles under the house.
There are many differing opinions as to the best way to house composting worms as well as what you can feed them… For us it is a fairly simple affair with only a few guidelines to keep the squirmers happy as well as the farms smelling "fresh"..
- We do not feed the worms dairy or meat products.. This is not because they won't eat them but more as a way not to attract vermin to the house..
- We also don't feed them citrus because it takes a while for them to chew through it as it isn't a favorite food of theirs..
- When feeding them animal manures we like to let the manure sit in bags for at least 6-8 weeks. That way any pharmaceuticals in there (like worm drench that will kill compost worms) can have a chance to break down..
- DRAINAGE!! The farm needs good drainage… If you don't have good enough drainage the farm will end up with a funky smell caused by anaerobic bacteria moving into the sloppy section… While worms can handle this for a little while it is not generally the best living conditions for them..
Friends of the worm..
There will always be other critters that you will find turning up in worm farms, like these guys..
 Don't worry about these chaps, they are black solider fly larvae.. The adults only have reproductive organs & give off a chemical that deters other unwanted flies, so are great to have around in small numbers… If you do get too many they can take over the farms. This has happened to us once… We just picked them out & fed them to the chooks (Will post about these guys again later)..
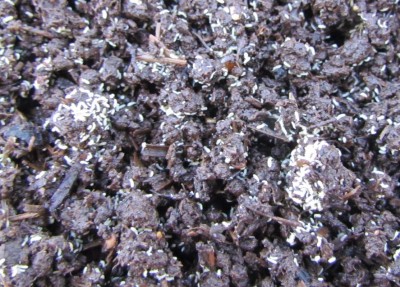 Springtails are another little critter that can be found in worm farms.. They are a little white bug no bigger than 1.5mm in length & are not really a pest as such, as they consume the microscopic fungus and help to break down the organic matter further… From what I have read, these guys play a beneficial roll in the worm farm, so don't really worry about them when they appear..
Our Farms...
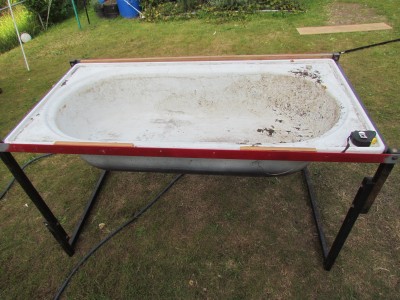
To help us boost the numbers of worms to be used as feed, a few of the farms are about to be consolidated into a large bath farm.. But before we get to that, here is brief trip down our wormy history…
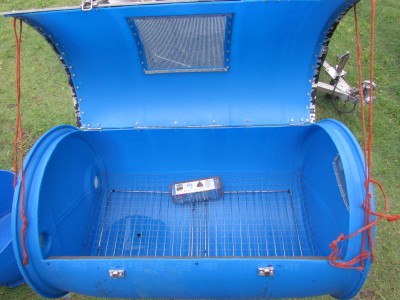
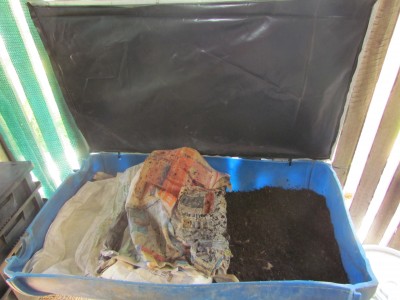
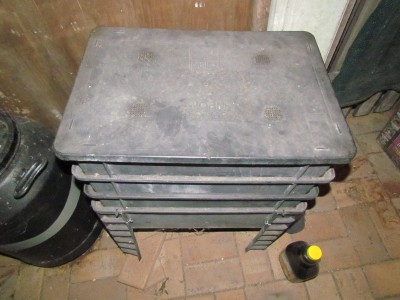 To begin with, we bought 2nd hand 3 tiered worm farm at a organic growers group fair.. After years of it living in my parents shed, we reclaimed it & set it up.. While it worked great we just couldn't get it to process the amount of scraps & horse manure we wanted it to do, so the blue barrel worm farm/kingdom was built at the end of 2010..
 << Click me to see earlier blog post on the farm…
This barrel farm has just been harvested so it can be re purposed into a black solider fly larvae farm.. They need to be set up differently, but I will cover that at a later date…
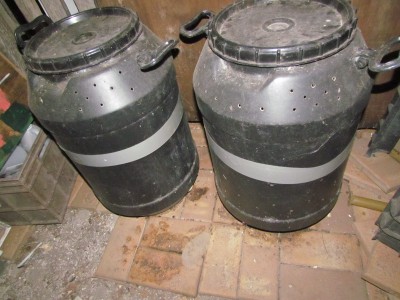 We also started 2 small black barrel farms which were once used as experimental compost tumblers. They never really worked very well at being tumblers, but instead worked great as a real basic little worm farm.. Can be easy to over feed them though..
 Another one we used for a while was a ½ 200L barrel with a make shift lid… It didn't last long as the barrel was pinched & used in our first little barrel Aquaponic set up…
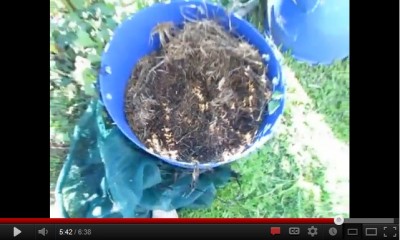 The last one we made up was the ½ barrel that lives in the yard.. This one was started when we discovered that one of the horse manure bags we had purchased was crawling with composting worms... The manure was emptied into the barrel just to see how they would go & they have done exceptionally well living off of the green trimmings from the patch..This one was looked at in an update You Tube clip for the wood chip compost we are trialing.. (click on the pic if interested)
Up till now the 2nd hand worm farm has been the most expensive farm we have had with the rest made from scrounged or purchased scrap materials.. So it just goes to show that you don't need to purchase a pre made worm farm to get the job done when it comes to worms.. They really aren't fussy where they live as long as they are fed well & walked regularly ; )»
A start has been made on the bath farm so will leave you with a teaser until next week..
This week in the patch..
This week we harvested the lemon grass in the wicking bathtub next to the house & transplanted the "Giant" Chinese capsicum into Bed #1… The rest of the water chestnuts in the tub down the back were also harvested..
 (click << for water chestnut clip)
I was only going to scrounge some soil from the water chestnut bed to plant some saved lemongrass shoots... But I ended up harvesting the rest of the water chestnuts after seeing that a few had started to shoot already.. So by the end of the day we had 21 water chestnuts & 8 lemongrass shoots planted out into various pots, plus 3 lemongrass shoots that were planted out into a refurbished wicking barrel.. The Giant Chinese Capsicum from the lemongrass bath was also planted out into Bed #1.. Hopefully it will do better there..
4 wicking barrels were remade into the "doughnut" style barrels. These have a much larger water holding capacity than the way they were originally made.. Some Early Wonder beetroot seeds were sown into one & the 3 lemongrass (from above) were planted into another... The last 2 are waiting for me to make up my mind as to what seeds to plant.. I am thinking of maybe sowing some more carrots into one tomorrow, but we shall see..
Some mini beetroots were sown into an aquaponic grow bed & a few French marigolds were also planted out in some coco peat pods.. Once they grow a bit, the marigolds will be planted out around the patch as an aphid & pest deterrent..
Happy Harvesting…
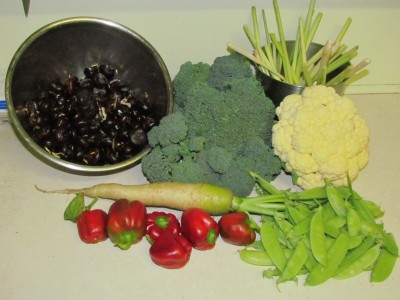
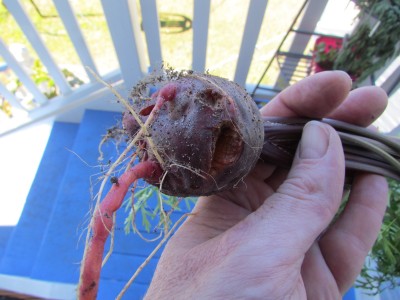
Picked the last of the current cauliflowers on Tuesday.. It is being treated like gold at the moment & has only been used in the tastiest of dishes, as it will be a few weeks before the first of the purple Sicilian caulies will be ready to harvest.. The side shoots of broccoli are being harvested continually & should tide us over until the last of the full heads are large enough to harvest.. All the peas are still pumping out pods daily.. They are one of the highlights of the winter pickings for us.. I think the giant Chinese capsicums (at the bottom of the shot) didn't do as well as they could of.. Hopefully they will do better in their new spot.. The heirloom mixed carrots are being harvested with mixed results.. The white one below is a magnificent specimen yet the purple carrot (left) has clearly had its growth retarded by some form of infection, nematodes we think…
Well, I managed to wabbit on again so shall call it quits here... Shall include the worm bath farm next week...
Have a great one all..
: )»

